Before and After:

Steps (grouped into multi-steps because we aren't kindergarteners):
1. Measure the mirror, make a visual plan, make a list of materials, and then buy them.
 |
We were lucky to not have to deal with mirror clips which protruded from the mirror. The pieces could be placed right over the clips. However, if you run into this issue, visit the Southern Hospitality Website as she explains how to deal with it. |
 |
Measure twice and draw it out! |
 | |
At Home Depot, you can cut your own lengths of composite molding. I would suggest getting a few more inches than needed and cutting it to size with the miter saw at home. We ended up not using the caulk but if you have some spaces between pieces, you will need it. Be sure to get clear. We also got Primer just because we weren't sure how the spray paint would hold on the molding. We had to buy everything except the level, measuring tape, and caulking gun and our total was $44. |
2. Measure carefully and use a miter saw for a clean cut.
 | |
A work bench would have been helpful but this coffee table worked out. Again, be sure to measure twice before cutting. I wouldn't say the saw cut like butter, but it wasn't a challenge either. |
3. Prime, paint, and paint again, and again.
 |
Primer and paint. |
 |
No primer needed on these wood pieces. Make sure you paint the back of each piece because you will be able to see some of it in the reflection of the mirror. |
4. Wait until the pieces are dry.
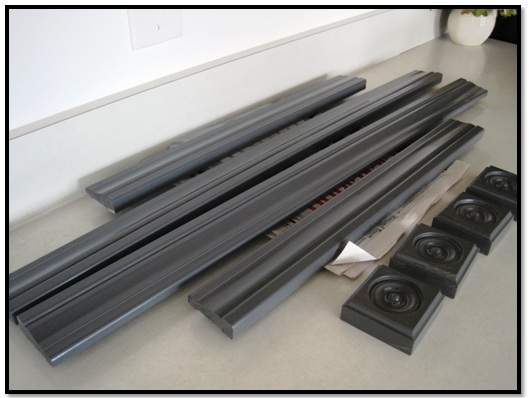 |
We used spray paint and we had to use multiple coats in order for the pieces to look fully covered. This was the most time consuming part but it is definitely important to wait until everything is fully dry. We waited 10-12 hours but we probably could have waited longer. |
5. Use Liquid Nails to attach the pieces. Apply pressure to each piece for a few minutes. Then, use painter's tape to hold the pieces in place.
*If using end pieces, measure and mark where to place the end pieces and where to place the frame pieces.
 |
Don't get Liquid Nails close to the edges. But if it does happen, the glue doesn't stain and is easy to get off of the mirror and the composite molding. It is also easy to get off of your hands. |
 |
The great thing about Liquid Nails is that it doesn't bond immediately so you can move or even remove a piece if needed. But the downside to that is that it doesn't immediately bond when you want it to. I would highly suggest holding each piece in place for a few minutes while applying pressure. We saw some pieces sliding slightly when we didn't do this. |
6. Wait 24 hours, carefully remove the tape, and enjoy your "new" mirror.

No comments:
Post a Comment